

In this tutorial, we will implement a Calendar app in various view Basic/Single Date Select, Multi-select and Date range in Ionic 4 application.
Prerequisite
Before start, verify that you are running the latest version of node and npm by running node -vand npm -v in a terminal/console window. Older versions produce errors, but newer versions are fine.
Install Node.js and npm if they are not already on your machine. Find the full instruction from NodeJs Official website https://nodejs.org/en/ and Install Ionic and cordova from Ionic official website – https://ionicframework.com/docs/intro/installation/.
So let’s get started,
Install Ionic
Install the Ionic CLI globally with npm:
$ npm install -g ionicCreate Calendar App
From the command line, create a blank Ionic project just run the ionic start command and the CLI will handle the rest.
$ ionic start calendar blankRun The App
$ cd calendar
$ ionic serve
The app will be up and running on localhost port 8100.
Install Package
$ npm install ion2-calendar@next moment --saveAfter installing the package we should enlist the ion2-calendar in application module. Import ion2-calendar module in home.module.ts file. After injecting module in the home.module.ts It’s look like this.
import { NgModule } from '@angular/core';
import { CommonModule } from '@angular/common';
import { IonicModule } from '@ionic/angular';
import { FormsModule } from '@angular/forms';
import { RouterModule } from '@angular/router';

import { HomePage } from './home.page';
import { CalendarModule } from 'ion2-calendar';

@NgModule({
  imports: [
    CommonModule,
    FormsModule,
    IonicModule,
    RouterModule.forChild([
      {
        path: '',
        component: HomePage
      }
    ]),
    CalendarModule
  ],
  declarations: [HomePage]
})
export class HomePageModule { }
Basic/Single Date Select
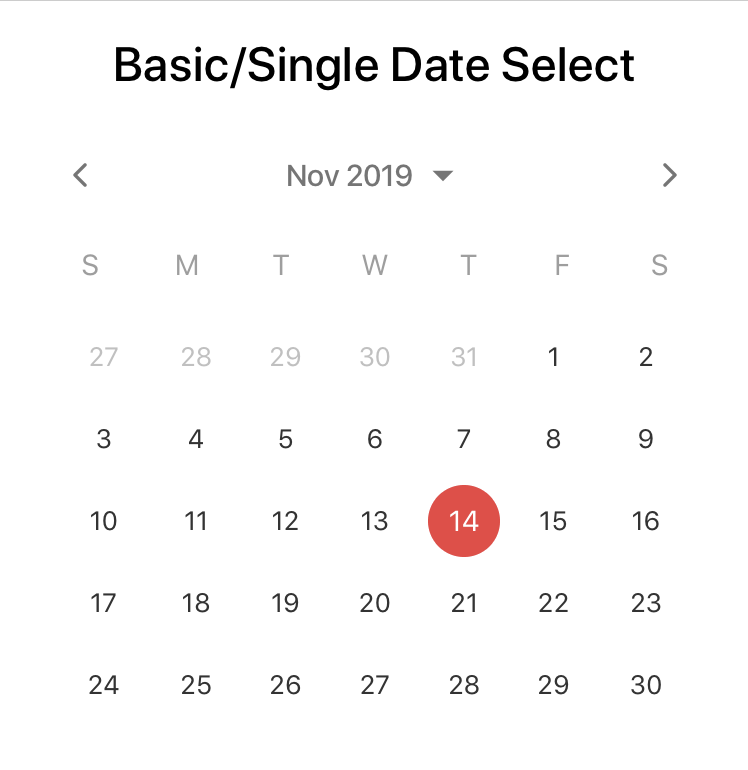
In home.html add single/basic component of calendar.
<ion-calendar [(ngModel)]="date"
              (change)="onChange($event)"
              [type]="type"
              [format]="'YYYY-MM-DD'">
</ion-calendar>
If you add some configuration in your calendar you can write the code at home.ts file. For example, change color of the text in calendar by adding this block to your home.ts file.
  optionsSingle: CalendarComponentOptions = {
    color: 'danger'
  };
and add this options into your component
<ion-calendar [(ngModel)]="date" [options]="optionsSingle" (change)="onChange($event)" [type]="type"
    [format]="'YYYY-MM-DD'">
  </ion-calendar>
Date Range
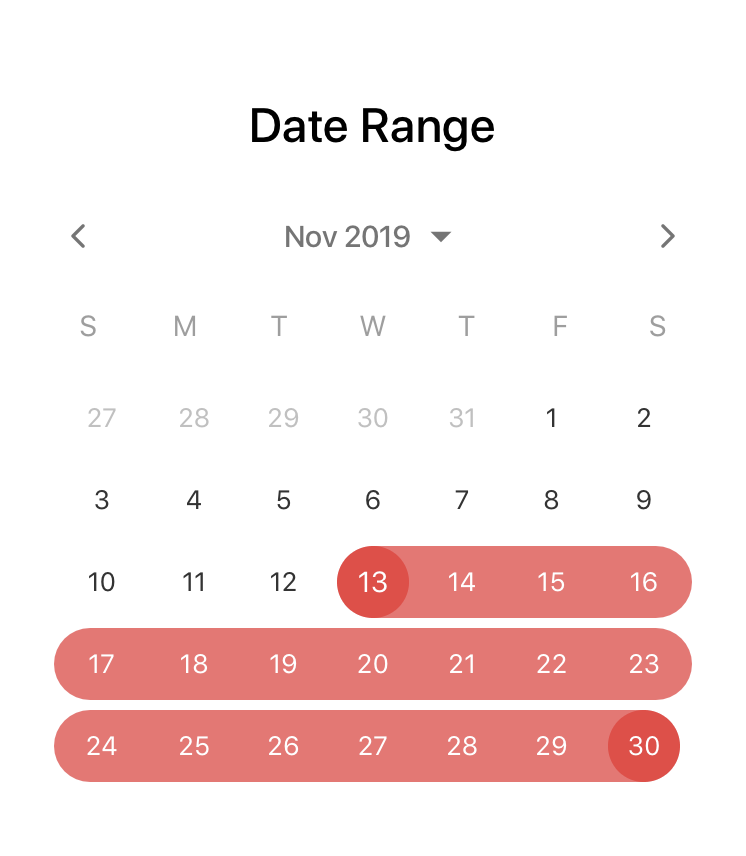
Add date range block component in your home.html file.
<ion-calendar [(ngModel)]="dateRange"
              [options]="optionsRange"
              [type]="type"
              [format]="'YYYY-MM-DD'">
</ion-calendar>
Add configuration options in your home.ts file.
  dateRange: { from: string; to: string; };
  type: 'string'; // 'string' | 'js-date' | 'moment' | 'time' | 'object'
  optionsRange: CalendarComponentOptions = {
    pickMode: 'range',
    color: 'danger'
  };
Multi Date
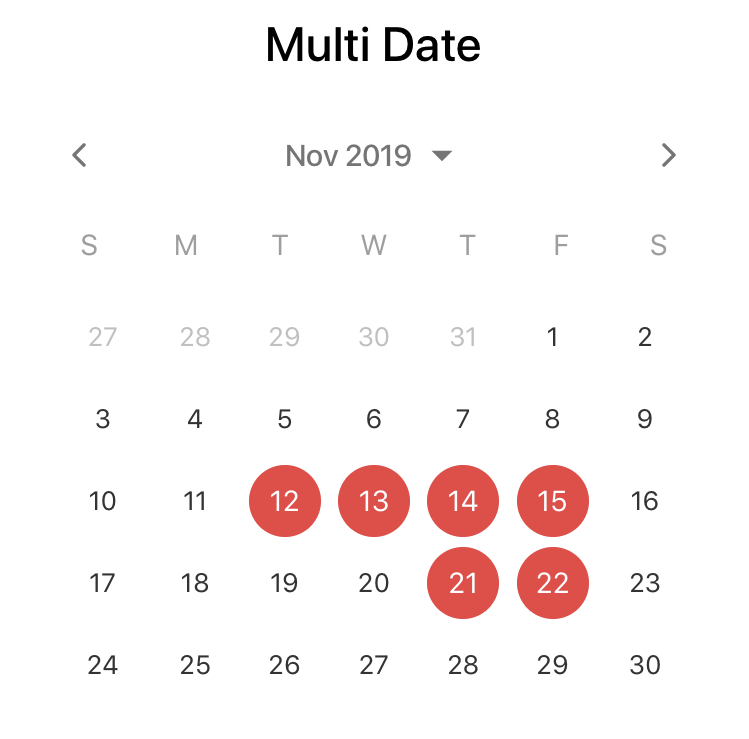
Add multi select date component in home.html file.
<ion-calendar [(ngModel)]="dateMulti"
              [options]="optionsMulti"
              [type]="type"
              [format]="'YYYY-MM-DD'">
</ion-calendar>
Add configuration options in your home.ts file.
dateMulti: string[];
  optionsMulti: CalendarComponentOptions = {
    pickMode: 'multi',
    color: 'danger'
  };
Here is the full implementation of home.ts file.
import { Component } from '@angular/core';
import { Platform } from '@ionic/angular';
import { CalendarComponentOptions } from 'ion2-calendar';


@Component({
  selector: 'app-home',
  templateUrl: 'home.page.html',
  styleUrls: ['home.page.scss'],
})
export class HomePage {

  // Single Date
  optionsSingle: CalendarComponentOptions = {
    color: 'danger'
  };

  // Date Range
  dateRange: { from: string; to: string; };
  type: 'string'; // 'string' | 'js-date' | 'moment' | 'time' | 'object'
  optionsRange: CalendarComponentOptions = {
    pickMode: 'range',
    color: 'danger'
  };

  // Multi Select
  dateMulti: string[];
  optionsMulti: CalendarComponentOptions = {
    pickMode: 'multi',
    color: 'danger'
  };


  constructor(
    public platform: Platform) {
  }

  onChange($event) {
    console.log($event);
  }
}
and home.html,
<ion-header>
  <ion-toolbar>
    <ion-title>
      Ionic 4 Calendar App
    </ion-title>
  </ion-toolbar>
</ion-header>

<ion-content>
  <!-- Basic/Single Date Select -->
  <h2 text-center>Basic/Single Date Select</h2>
  <ion-calendar [(ngModel)]="date" [options]="optionsSingle" (change)="onChange($event)" [type]="type"
    [format]="'YYYY-MM-DD'">
  </ion-calendar>

  <!-- Date Range -->
  <h2 text-center>Date Range</h2>
  <ion-calendar [(ngModel)]="dateRange" [options]="optionsRange" [type]="type" [format]="'YYYY-MM-DD'">
  </ion-calendar>

  <!-- Multi Date Select -->
  <h2 text-center>Multi Date</h2>
  <ion-calendar [(ngModel)]="dateMulti" [options]="optionsMulti" [type]="type" [format]="'YYYY-MM-DD'">
  </ion-calendar>
</ion-content>
Package Details,
https://github.com/HsuanXyz/ion2-calendar